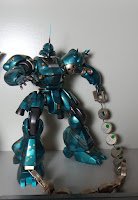
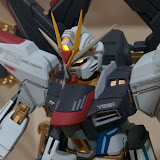
Someone broke my grand slam...Rrrrrrr....
So, fixed it and added a slight curve at the tip...probably looked strange...lol...
And also updated some new picture for my MG Strike freedom, since I also fixed the joints on its wings....check out the gallery...
土曜日, 12月 03, 2011
日曜日, 11月 27, 2011
HG Delta Plus Limited Edition
Got this HG Delta Plus limited edition.....finished in no time, and of course look great. But too bad the clear parts make it hard to customise the colour. I guess the clear parts itself are something to be awed...xD...Pics in gallery (Forgot and lazy to to provide link). Apologised to Delta Plus. Now provide a proper link to its gallery for more of its photo.
As usual, don't expect my next update to be soon...
As usual, don't expect my next update to be soon...
MG Kampfer remastered
Ok...guilt kicks in and I think I need to have a proper post for this. Otherwise, my new MG Kampfer won't be satisfied. First, it's still not 100% finished. Left weapons which I need to find time and motivation to complete. Only the Kampfer itself and the mines are done.
And of course, I need to highlight its awesomeness by having the comparison between the before and after remake.
More photos in the gallery below.
And of course, I need to highlight its awesomeness by having the comparison between the before and after remake.
More photos in the gallery below.
木曜日, 5月 05, 2011
Teaser: MG Kampfer
Currently doing some re-work on my MG Kampfer, but due to work commitment, can't finish it anytime soon. But here's a few pictures as teaser. Colour scheme for Kampfer: Pure Metallic!!!
And of course, a common thing in my MG now, LED eye.
And a bit of an extra. Made a handle for the HG 00Q sword pieces. Now, still figuring how to squeeze and LED and 2 battery into its body.
And of course, a common thing in my MG now, LED eye.
And a bit of an extra. Made a handle for the HG 00Q sword pieces. Now, still figuring how to squeeze and LED and 2 battery into its body.
日曜日, 3月 27, 2011
Two months of keropla-ing
Recently just finished a few of keroro gunsou models. Again, and as usual, tired from keropla-ing and so, won't be any updates till next model completion, which is not soon (as usual)...xD.
 |
| Kururu Robo MK II |
 |
| Dororo Robo Mk II |
 |
| Dororo Touryou (Chief support) |
 |
| Dororo Robo Touryou |
木曜日, 1月 13, 2011
Evolution of my gundam LED head unit
My first LED head unit is on SD grade, which is Red Frame Astray. It is done by not installing the eye part, but use a green transparency for book cover as the eye part and two 3mm LED as the eyes. Batteries used are button cell.
Next LED head unit done is on SD strike freedom. Right pic is the LED unit. Again, 3mm LED is used and there is separate battery compartment. The "eyes" are cut out from the eye part and replaced by transparent plastic (from CD case).
The third LED is done on SD Zaku Gunner, with one 5mm LED as the 5mm LED fit right into the Zaku eye size. Yes, the flexibility to turn the eye is maintained!
The fourth, and the last LED head unit on SD grade is on SD Strike gundam. I was thinking of modding the SD gundams, but getting lazy so until now my SD strike still haven't completed. Only the Head is done. Same thing, two 3mm LED, battery compartment made from plastic sheet for book cover. The "eyes" are cut and replaced by transparent plastic from CD case.
Now, then, onto MG gundams. My first MG LED head unit is on MG Turn A gundam. It uses one 3mm white LED, with 3 button cells (because the LED somehow required higher voltage). As can be seen, the LED unit is removable from the head..
The next one is on MG Zaku 2, Char's counterattack. It has a built in, non-removable LED unit which still maintain the ability for the eye to move around. However, the unit is too fragile and breaks down even when replacing the battery. In addition, it is also hard to replace the battery as a few parts need to be taken apart first. So in the end, abandon the project, and it is considered as a failure. Oh, forgot to mention, got my hand on the surface mount (SMT) LED, which is so small that installing a LED into MG gundam is no longer a problem. The only problem left is the battery.
Next one is on MG RX-78 OYW version. It uses SMT LED and the LED unit is removable. My first LED unit with battery on side by side.
And the latest one is on MG strike freedom. Again, since SMT LED is used, no problem with the LED. As for the battery, manage to find place (with some plastic removed) to fit them. It is a built in, non-removable LED unit, and also my first separate system (battery compartment and LED are on separate parts).
I first started with SD grade is because the head is big and provide sufficient empty space for battery and LED. However, since now I have the SMT LED and able to drill/cut/grind plastic (with Dremel tool), installing LED on MG gundams will be easier than last time, though again not all MG can head canbe installed with LED (e.g. MG RX-78-2, the head is just full of inner frame).
Behold, MG strike freedom!!!
Finally done my MG SF. It took me quite a long time to complete it, but I am very satisfied with the end product. When reflect back, a lot of time, energy, money, frustration, etc had been spent (probably should be better off spending them on other thing) on gunpla all just for moments like this (the completion of a model, sense of achievement, joy, etc). Worth it or not, I won't say, but I really enjoy it. So, here's my MG SF.
And so, MG SF is now my best MG, followed by MG strike IWSP. As for HG, best is RGM-79, followed by RX-0 Unicorn. SD best is Zaku Gunner, followed by SD strike freedom.
And so, MG SF is now my best MG, followed by MG strike IWSP. As for HG, best is RGM-79, followed by RX-0 Unicorn. SD best is Zaku Gunner, followed by SD strike freedom.
登録:
投稿 (Atom)


